- What Is Microsoft PowerPoint?
- Understanding the PowerPoint Interface
- Step 1: Open PowerPoint and Choose a Starting Point
- Step 2: Set Up Your Title Slide
- Step 3: Add New Slides
- Step 4: Add and Format Text
- Step 5: Insert Images, Icons, and Media
- Step 6: Use the Design Tab to Style Your Presentation
- Step 7: Add Charts and Data Visualizations
- Step 8: Add Transitions Between Slides
- Step 9: Animate Your Content
- Step 10: Run and Deliver Your Presentation
- Step 11: Save and Share Your Presentation
- 5 Expert PowerPoint Tips to Take Your Slides to the Next Level
- Final Thoughts
- Frequently Asked Questions About Using PowerPoint
How to Use PowerPoint: The Complete Step-by-Step Guide for Beginners and Beyond

- What Is Microsoft PowerPoint?
- Understanding the PowerPoint Interface
- Step 1: Open PowerPoint and Choose a Starting Point
- Step 2: Set Up Your Title Slide
- Step 3: Add New Slides
- Step 4: Add and Format Text
- Step 5: Insert Images, Icons, and Media
- Step 6: Use the Design Tab to Style Your Presentation
- Step 7: Add Charts and Data Visualizations
- Step 8: Add Transitions Between Slides
- Step 9: Animate Your Content
- Step 10: Run and Deliver Your Presentation
- Step 11: Save and Share Your Presentation
- 5 Expert PowerPoint Tips to Take Your Slides to the Next Level
- Final Thoughts
- Frequently Asked Questions About Using PowerPoint

Whether you’re preparing a business pitch, a school project, a training session, or a keynote speech, knowing how to use PowerPoint is one of the most valuable digital skills you can have. Microsoft PowerPoint has been the world’s leading presentation software for over three decades — and for good reason. It’s intuitive, powerful, and versatile enough to serve everyone from first-time users to seasoned professionals.
In this complete guide, you’ll learn everything you need to know about using PowerPoint effectively, from launching the application for the very first time to delivering a polished, professional presentation with confidence.
Let’s get started.
What Is Microsoft PowerPoint?
Microsoft PowerPoint is a presentation software application developed by Microsoft and included in the Microsoft 365 (formerly Office) suite. It allows users to create visual slideshows that can combine text, images, charts, videos, animations, and more – all designed to communicate ideas clearly and engagingly.
PowerPoint is used across virtually every industry and setting, including:
- Business — sales decks, investor pitches, quarterly reports
- Education — lesson plans, research presentations, student projects
- Marketing — campaign presentations, product launches, brand storytelling
- Training & HR — employee onboarding, workshops, compliance training
- Personal — wedding slideshows, event planning, portfolios
Before we dive into the step-by-step process, let’s quickly get familiar with the PowerPoint interface.
Understanding the PowerPoint Interface

When you open PowerPoint, you’ll see a workspace made up of several key areas. Understanding these will make everything else much easier.
1. The Ribbon — This is the horizontal toolbar at the top of the screen. It’s divided into tabs: Home, Insert, Design, Transitions, Animations, Slide Show, Review, and View. Each tab contains related tools and commands organized into groups.
2. The Slide Panel — Located on the left side, this panel shows thumbnail previews of all your slides. You can click any thumbnail to navigate to that slide, or drag and drop them to reorder.
3. The Editing Area — The large central workspace where you build and edit individual slides. This is where most of your work happens.
4. The Notes Pane — Found below the editing area, this is where you can type speaker notes for each slide – helpful reminders visible only to you during your presentation.
5. The Status Bar — At the very bottom of the screen, this shows you the current slide number, total slide count, and quick access to different view modes.
Now that you’re oriented, here’s how to use PowerPoint from the very beginning.
Step 1: Open PowerPoint and Choose a Starting Point

Launch PowerPoint from your desktop, Start menu, or Applications folder. You’ll be greeted by the Start Screen, which gives you two options:
- Blank Presentation — Start from a completely empty canvas. Best if you want full creative control.
- Template — Choose from hundreds of professionally designed templates. Best for saving time and maintaining a polished look.
For beginners, using a template is highly recommended. Simply browse the available options or type a keyword (such as “business,” “education,” or “minimal”) in the search bar to find a design that suits your needs.
Once you’ve made your selection, click to open it and you’re ready to begin building your presentation.
Step 2: Set Up Your Title Slide

Every great presentation starts with a strong title slide. This is the first thing your audience sees, so make it count.
Click on the text placeholder that says “Click to add title” and type the name of your presentation. Below it, you’ll typically find a subtitle placeholder — use this to add your name, the date, your company, or a one-line description of what the presentation covers.
To format your text, highlight it and use the Home tab on the Ribbon to change the font, size, color, alignment, and style. Keep it clean, readable, and consistent with your overall theme.
Step 3: Add New Slides

To add a new slide, go to the Home tab and click the New Slide button. You can also right-click in the Slide Panel on the left and select New Slide from the context menu.
When you add a new slide, PowerPoint will prompt you to choose a layout – a pre-structured arrangement of text and content placeholders. Common layouts include:
- Title and Content — A heading with a large body area below (great for text-heavy slides)
- Two Content — Two side-by-side content areas (great for comparisons)
- Blank — No placeholders, giving you complete freedom
- Title Only — A heading with an open area below (great for image-led slides)
Choose the layout that best fits the information you want to present on that particular slide.
Step 4: Add and Format Text

Click inside any text placeholder to start typing. Once your text is in place, you can format it using the tools in the Home tab:
- Change the font and font size to improve readability
- Use Bold, Italic, or Underline for emphasis
- Adjust text alignment (left, center, right, or justified)
- Change text color using the font color tool
- Use bullet points or numbered lists for structured content
A key best practice: keep your slide text concise. Slides should support your spoken words, not replace them. Aim for no more than 6 words per bullet point and no more than 6 bullet points per slide — this is often called the 6×6 rule.
Step 5: Insert Images, Icons, and Media

Visual content dramatically improves audience engagement. To insert an image, go to the Insert tab and click Pictures. You can choose from:
- This Device — Upload an image saved on your computer
- Online Pictures — Search and insert royalty-free images directly from Bing
- Stock Images — Access Microsoft’s built-in library of high-quality photos (available with Microsoft 365)
Once inserted, click on the image to reveal the Picture Format tab, where you can crop, apply styles, adjust brightness and contrast, and add artistic effects.
You can also insert Icons (Insert > Icons), Videos (Insert > Video), Audio (Insert > Audio), and even 3D Models to make your presentations truly dynamic and multimedia-rich.
Step 6: Use the Design Tab to Style Your Presentation

Consistency is everything in a great presentation. The Design tab gives you access to:
- Themes — Pre-built visual styles that apply consistent colors, fonts, and effects across all slides
- Variants — Alternate color schemes within a selected theme
- Slide Size — Switch between Standard (4:3) and Widescreen (16:9) formats depending on your display
To apply a theme, simply click on it in the Design tab and PowerPoint will instantly update all your slides. You can also customize individual elements by using the Format Background option to add solid colors, gradients, patterns, or full-bleed images as slide backgrounds.
Step 7: Add Charts and Data Visualizations
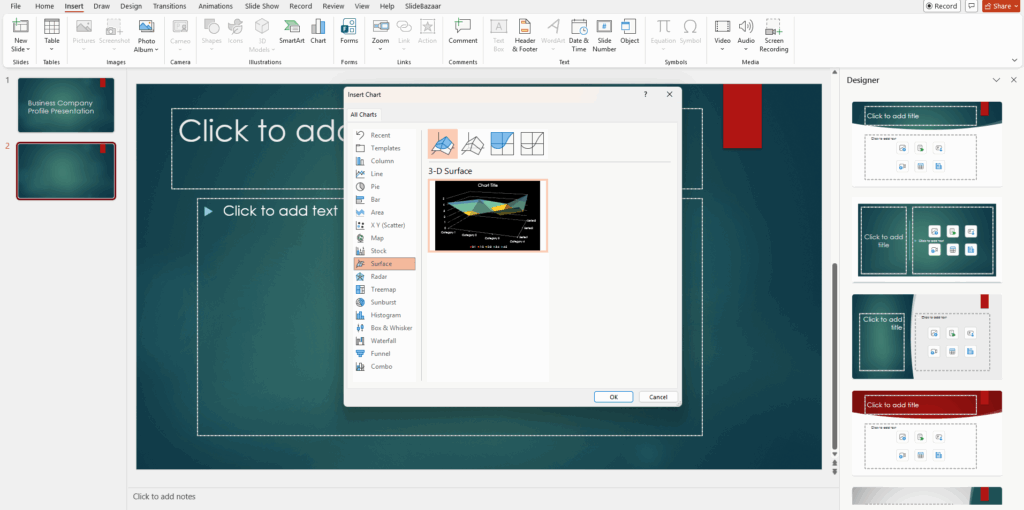
If your presentation involves data, PowerPoint’s chart feature is incredibly powerful. Go to Insert > Chart, choose a chart type (bar, pie, line, column, etc.), and enter your data in the embedded Excel spreadsheet that appears.
PowerPoint will automatically generate a styled chart based on your numbers. You can customize colors, labels, legends, and axis titles using the Chart Design and Format tabs that appear when the chart is selected.
For more visual data storytelling, try SmartArt (Insert > SmartArt) — a feature that lets you turn plain text lists into professional-looking diagrams, processes, hierarchies, and cycles in just a few clicks.
Step 8: Add Transitions Between Slides
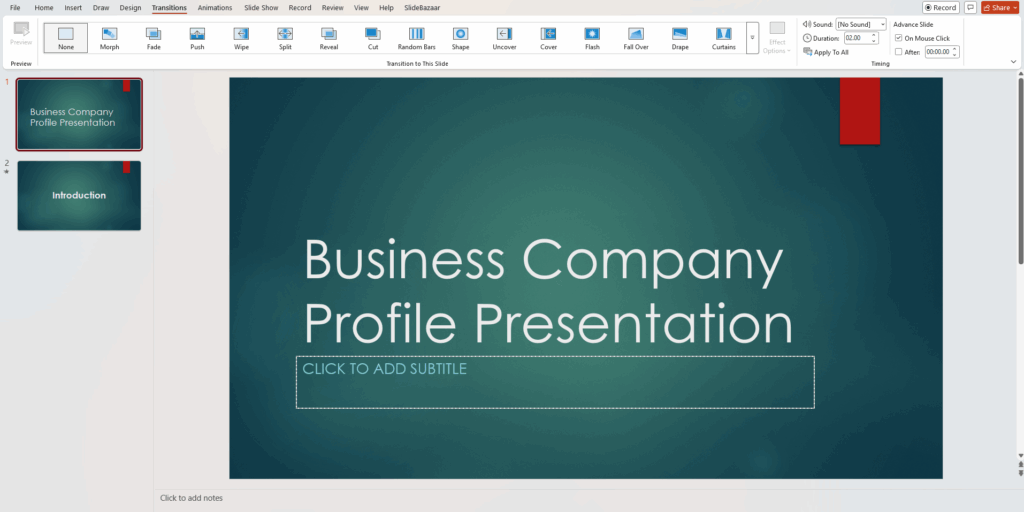
Transitions are the visual effects that play when you move from one slide to the next. To add them, click on a slide in the Slide Panel, then go to the Transitions tab.
Browse the gallery and click any transition to preview it. You can control the duration (how long the transition takes) and set it to advance on a mouse click or automatically after a set number of seconds.
Pro tip: Less is more with transitions. Stick to one subtle transition style (like Fade or Push) throughout your entire presentation for a clean, professional look. Avoid mixing multiple transition styles — it can look chaotic and distract from your content.
Step 9: Animate Your Content
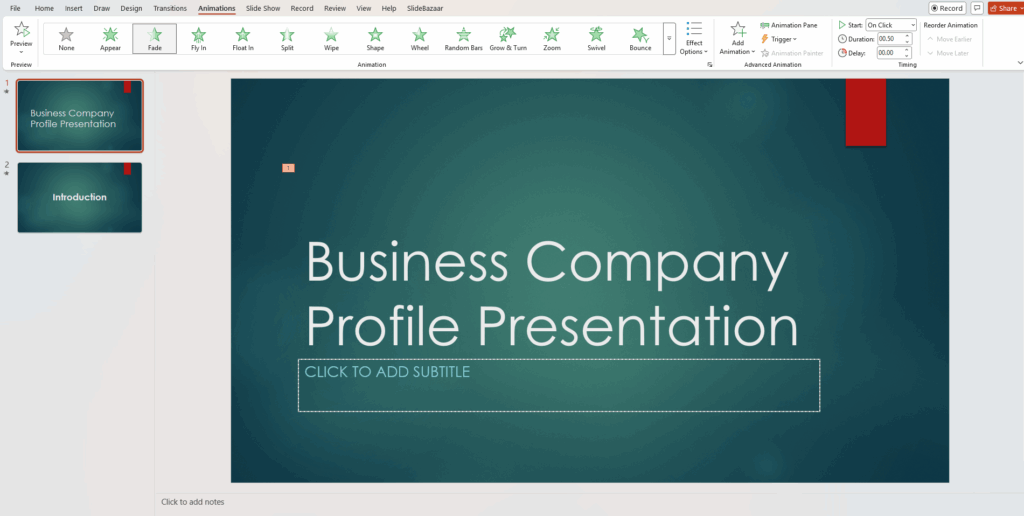
Animations add movement to individual elements on a slide — text, images, charts, and shapes. To add animations, select an object on your slide and go to the Animations tab.
You’ll find four types of animation effects:
- Entrance — How the element appears on screen (e.g., Fade In, Fly In)
- Emphasis — Effects that draw attention while the element is on screen (e.g., Pulse, Spin)
- Exit — How the element disappears (e.g., Fade Out, Zoom)
- Motion Paths — Custom paths that move the element across the slide
Use the Animation Pane (Animations > Animation Pane) to control the order, timing, and duration of all animations on a slide. Again, restraint is key — too many animations will overwhelm your audience rather than engage them.
Step 10: Run and Deliver Your Presentation
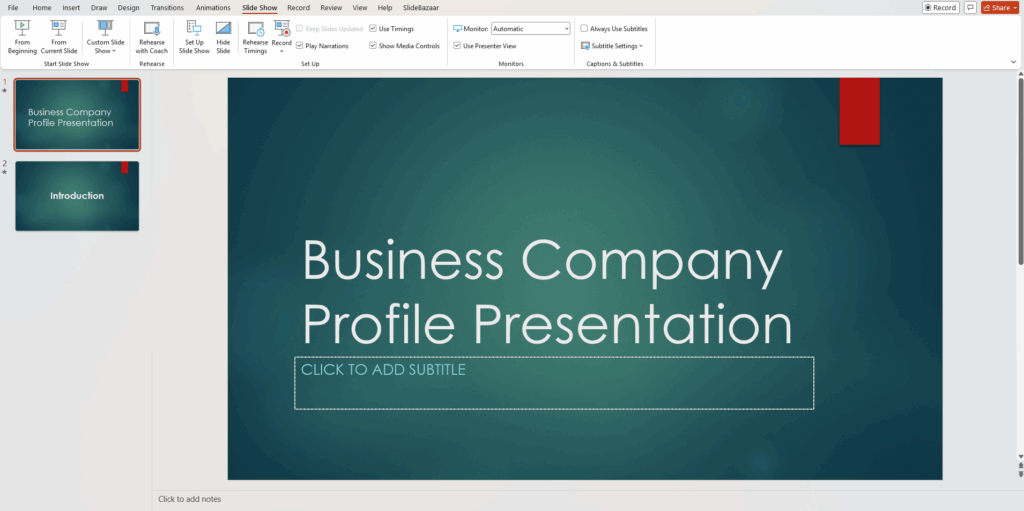
When your slides are ready, it’s time to present. Go to the Slide Show tab and choose:
- From Beginning — Starts the presentation from slide 1
- From Current Slide — Starts from whatever slide you’re currently on
- Presenter View — Shows your slides on the main screen while displaying your notes and a timer on your private screen (ideal for live presentations with a second monitor)
During your presentation, use the arrow keys or spacebar to advance slides, and press Escape to exit at any time. You can also use the on-screen laser pointer (hold Ctrl and click) to highlight areas of your slide while presenting.
Step 11: Save and Share Your Presentation

Always save your work regularly. Use Ctrl + S (Windows) or Cmd + S (Mac) to save quickly.
To save in different formats, go to File > Save As and choose from:
- .pptx — Standard PowerPoint format (editable)
- .pdf — Fixed format, great for sharing when you don’t want edits
- .mp4 — Export as a video with all animations and transitions intact
- .pps — PowerPoint Show format that opens directly in presentation mode
To share online, use File > Share to invite collaborators via OneDrive or send a link. PowerPoint Online (via Microsoft 365) also allows real-time collaboration, similar to Google Slides.
5 Expert PowerPoint Tips to Take Your Slides to the Next Level
Now that you know the basics, here are five advanced tips to make your presentations truly stand out:
1. Use the Slide Master for Consistent Design — The Slide Master (View > Slide Master) lets you edit the master layout of all your slides at once. Any changes you make here — fonts, logos, background elements — apply globally, saving you hours of manual editing.
2. Align and Distribute Objects Perfectly — Avoid manually dragging elements into place. Select multiple objects, go to the Home tab > Arrange > Align, and use the alignment and distribution tools to position everything pixel-perfectly.
3. Use Morph Transition for Cinematic Effects — The Morph transition (Transitions > Morph) creates smooth, fluid movement between slides that makes your presentation look like a high-budget animation. Duplicate a slide, move or resize elements, then apply Morph — PowerPoint does the rest.
4. Compress Your Media Files — Large presentations with many images and videos can become slow and hard to share. Go to File > Info > Compress Media to reduce file size without noticeably impacting quality.
5. Use Speaker Coach to Perfect Your Delivery — PowerPoint’s built-in AI feature, Speaker Coach (Slide Show > Rehearse with Coach), listens to your voice as you practice and gives you real-time feedback on pacing, filler words, tone, and more. It’s like having a personal presentation trainer built right in.
Final Thoughts
Learning how to use PowerPoint is a journey that starts with the basics and grows with experience. The tools are all there — from simple text formatting and image insertion to advanced animations, data visualizations, and AI-powered coaching. What matters most is how you use those tools to tell a compelling story.
Start simple. Build consistently. Focus on your audience. And with time and practice, you’ll be creating PowerPoint presentations that don’t just inform — they inspire.
Now open PowerPoint, and start building your first slide. Your next great presentation is waiting to be made.
Frequently Asked Questions About Using PowerPoint
A: PowerPoint is included in Microsoft 365 subscriptions (paid). However, a limited free version is available through PowerPoint for the Web at office.com – no download required.
A: Yes. Microsoft PowerPoint is fully available for macOS and works almost identically to the Windows version.
A: Yes. Upload your .pptx file to Google Drive, right-click it, and select “Open with Google Slides.” Most formatting will be preserved, though some elements may need minor adjustments.
A: A common guideline is one slide per minute of speaking time. For a 10-minute presentation, aim for around 10 slides. Quality always beats quantity – fewer, well-crafted slides are more effective than dozens of cluttered ones.
A: For most modern screens and projectors, Widescreen (16:9) is the recommended size. Go to Design > Slide Size > Widescreen (16:9) to set it.
Related Articles
 March 10th, 2026
80+ Creative and Fun PowerPoint Night Ideas: Topics for Your Next PowerPoint Night
PowerPoint Tutorials- February 27th, 2026
How to Convert PowerPoint to Google Slides: 4 Easy Methods (Step-by-Step)
PowerPoint Tutorials - March 5th, 2026
How to Create a Timeline in PowerPoint: Free PowerPoint Timeline Templates and Google Slides
PowerPoint Tutorials